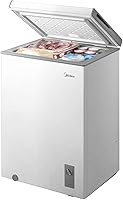
How to Organize a Chest Freezer, Step by Step
Here's how to organize a chest freezer: group food in lift-out bins, label each group and keep older packs above newer ones. Measure around the compressor hump and leave room to lift each basket.
On this page (11 sections)
- What are the six steps to organize a chest freezer?
- How do you empty and sort without leaving food out?
- Which food groups should get their own bins?
- How do you choose bins that actually fit?
- How should you arrange the bottom and upper layers?
- Should you add a hanging basket for everyday food?
- What labels and inventory system will you keep using?
- How do you rotate food and care for the baskets?
- What temperature should you check after organizing?
- Which organizing mistakes cause the most extra work?
- How to organize a chest freezer around your household
Here's how to organize a chest freezer: sort food into lift-out groups, give each group a fixed spot and put older packs within easy reach. Choose bins only after measuring the usable space, including the compressor hump and the clearance beneath hanging baskets.
The goal is to find dinner without unpacking the freezer. If you're still choosing an appliance, our garage-ready chest freezers guide explains garage use and the available sizes.
What are the six steps to organize a chest freezer?
Organize in this order: protect the food, sort it, measure for bins, arrange the groups, label everything and build a rotation habit. Start with containers you already have if they suit freezer use and fit comfortably.
- Move food into coolers or work through one section at a time.
- Group packs by food type and how often you use them.
- Measure the interior before choosing baskets.
- Put everyday food above reserve stock.
- Label bins and record what's inside.
- Move older packs forward whenever you reload.
How do you empty and sort without leaving food out?
Keep food in closed coolers while you work, and finish one manageable section before starting another. Set out labels, a marker and your measuring tape first so frozen packs aren't waiting while you gather supplies.
Choose a time when stock is low. Keep food away from warm surfaces and direct sunlight, and don't leave everything spread across the counter for a long sorting session.
If frost blocks the baskets or reduces usable space, follow our how to defrost a chest freezer fast guide before measuring. Our how to clean a deep freezer guide covers the empty liner and removable parts.
Check packaging as you sort. Rewrap damaged outer packaging where appropriate, and set uncertain food aside for a separate safety decision rather than hiding it beneath new groceries.
Which food groups should get their own bins?
Give each bin a category you can recognize at a glance, such as meat, vegetables, prepared meals or bread. Split a category only when its size or your cooking habits make that useful.
A household that cooks chicken most nights may need a separate chicken bin. Someone who batch cooks may get more value from dividing ready meals by portion size.
Keep small loose packs together in a freezer-safe bag or container inside the basket. Wire bins organize packages, but they don't replace sealed food packaging or contain leaks.
Reserve a small “use next” area for older packs and opened bags. Keep it visible so it becomes the first stop when planning meals.
How do you choose bins that actually fit?
Choose bins by usable interior dimensions, not the freezer's advertised capacity. Measure the floor area, the space above the compressor hump and the height below any rail basket separately.
Allow room to grip the handles and lift a loaded basket straight up. A bin that fits tightly against every wall may be awkward to remove once it holds food.
Check both possible orientations with a cardboard footprint before ordering. Our best chest freezer organizers and bins guide helps compare basket styles.
How to organize a chest freezer with larger fixed bins
Choose MSERCUOR for broad food groups when your freezer has enough uninterrupted space. Each basket measures 15.1 by 8 by 6.5 inches, with straight sides and inward-folding handles for stacking.
These bins suit households storing several packs of the same food together. Skip this set if the footprint crowds the compressor hump or a full basket would be too heavy for you to lift comfortably.
The baskets also fold for storage when unused. Leave the top clear of overhanging food so another basket can sit on its supports.
When are smaller Goovilla bins the better choice?
Choose Goovilla for narrower spaces or smaller food groups that you want to lift separately. Each coated iron basket measures 12.6 by 6.3 by 5.27 inches.
The lowerable handles help with access, while bottom support rods engage when the bins are stacked. This set suits separate groups such as fish portions, vegetables and breakfast food.
Skip it if you mainly store bulky roasts or large meal trays. Smaller baskets can divide a freezer neatly, but too many divisions leave awkward gaps around large packages.
When do adjustable ANJUBAN bins make sense?
Choose ANJUBAN when a larger freezer needs wider baskets with adjustable length. Each bin extends from 11.65 to 17.4 inches and measures 11.88 inches wide by 6.1 inches high.
The reinforced metal frames, mesh bottoms and collapsible handles suit grouped reserve stock. The mesh helps retain small packages, but it isn't a sealed tray for liquid leaks.
Skip these bins if their width blocks access or you prefer light loads. For appliance layouts in this size range, see our large chest freezer guide.
How should you arrange the bottom and upper layers?
Put heavier reserve stock below and frequently used food above, with an easy route to every lower basket. Try the layout with empty bins before returning the food.
Use the compressor hump for packages or containers that sit securely on it. Keep anything stored there clear of the lid and the path of sliding baskets.
A single layer gives the easiest access, while stacked bins use more height. If you stack, keep the arrangement shallow enough that reaching dinner doesn't require unloading several heavy baskets.
Don't fill every gap simply because space remains. A little working room lets you move baskets and grip handles without scraping packages along the walls.
Should you add a hanging basket for everyday food?
Add a hanging basket if compatible rails let it slide aside and expose the food below. It suits small items you reach for often, such as frozen fruit, lunch portions and opened vegetable bags.
The Orgneas basket has a locking telescoping span of 16.5 to 26.5 inches, with a 9-inch width and 6.5-inch height. Orgneas also gives a separate inside-width fit range of 14.5 to 24.5 inches.
Because those measurements describe different parts of the fit, confirm your freezer's rail spacing and support shape before choosing it. Skip a rail basket if your freezer lacks suitable supports or the basket would block too much lower access.
Adjust and secure it while empty. Check that both ends rest securely, it slides as intended and the lid closes freely before adding food.
What labels and inventory system will you keep using?
Use short category labels on surfaces you can see from above, then label individual food packs with their contents and freezing date. Freezer-suitable tape or labels should go on clean, dry packaging.
Write useful amounts, such as “2 portions,” on homemade meals. That saves you from thawing a family-sized pack when you only need lunch.
Keep a simple map beside the freezer showing each bin's location. Add a short inventory of major items, and cross them off when removed.
An inventory that says “chicken: 4 packs” is easier to maintain than a detailed spreadsheet nobody updates. Record enough to prevent duplicate buys without turning grocery storage into another chore.
How do you rotate food and care for the baskets?
Move older packs into reach before adding new food underneath or behind them. Keep dates visible, and place older food at the top of its own category rather than mixing all categories together.
Freeze suitable foods in flat, labeled portions before filing them upright. Don't squeeze unfrozen bags tightly between baskets where they may freeze into an awkward shape.
Lift baskets level and use the stacking supports intended for that model. Reduce the load if you need to strain or lean hard over the freezer to move it.
Wipe up spills promptly and dry cleaned baskets before returning them. Follow the freezer manual for liner care, and avoid abrasive tools that could damage basket coatings or the interior.
What temperature should you check after organizing?
Keep the freezer at 0°F (-18°C) or below, following USDA freezing guidance. Close the lid promptly after loading and monitor the temperature as the freezer recovers.
Our guide to what temperature a deep freezer should be explains temperature checks. If you need a separate monitor, compare the options in our deep freezer thermometers and alarms guide.
Which organizing mistakes cause the most extra work?
The biggest mistakes are buying by cubic feet alone and making lower food too hard to reach. A layout works only if you can keep using it after a large grocery trip.
- Overloaded bins: divide heavy food into smaller loads.
- Blocked lower layers: leave room to lift or slide the upper basket.
- Food above the rim: keep stacking supports clear.
- Hidden dates: face labels upward or toward the access point.
- Too many categories: combine groups that rarely fill a basket.
- No room for new groceries: leave some space for rotation.
Check the inventory before shopping and straighten one bin when putting food away. Save a full reset for a layout that no longer matches what you buy.
How to organize a chest freezer around your household
Choose MSERCUOR for broad food groups, Goovilla for smaller divisions, ANJUBAN for adjustable baskets in larger spaces and Orgneas for a reachable rail layer. Your measurements and comfortable lifting load should settle the choice.
Start with fewer bins and leave room for bulky food. Add another container only when a repeated problem, such as buried vegetable bags, shows where it belongs.
If the freezer still feels cramped after sorting and removing duplicates, use our chest freezer size guide to decide whether your household needs more capacity.
Frequently asked questions
How often should I reorganize a chest freezer?
Check the layout before a large grocery trip and move older packs into reach when you reload. A full reset is useful when categories spill into each other or you can no longer find food from the map; keep the routine short enough that everyone in the household can follow it.
Do I need to empty the whole freezer to organize it?
No, you can organize one section at a time if the freezer is clean and frost isn't blocking access; move that section's food into a cooler while you sort. Empty the whole freezer when you need to defrost it, clean the liner or measure a new layout accurately.
What size bin fits a 5 or 7 cu ft chest freezer?
Choose by usable inside measurements, not cubic feet alone; measure the open floor area, the space above the compressor hump and the clearance beneath any hanging basket. Allow room for handles and lifting, then compare those measurements with each bin's full dimensions before choosing a set.
Can I hang a basket on the freezer rails?
Yes, if your freezer has compatible rails and the basket rests securely on them; check the rail spacing, support shape and lid clearance before loading it. The Orgneas basket has an adjustable span and locking design, but those features don't make it compatible with every chest freezer.
What goes at the bottom of a chest freezer?
Put newer reserve packs and heavier food groups at the bottom, inside bins you can still lift comfortably; keep older packs and everyday portions nearer the top. Avoid putting loose small bags underneath everything else, because reaching them means moving the rest of your food first.